
As requested, here is how I made the hula skirt for
Camilla's Hawaiian Luau Birthday Party...
And even further down this page you can learn how to make a palm tree.
But FIRST, the hula skirt.
And just for the record, I am not really good at explaining things. haha
Camilla's Hawaiian Luau Birthday Party...
And even further down this page you can learn how to make a palm tree.
But FIRST, the hula skirt.
And just for the record, I am not really good at explaining things. haha
THINGS YOU NEED:
garbage bag, scissors, iron, parchment paper, elastic or chinese jump rope and weights or clothes line clips to keep the bag in place.
STEP ONE
Cut off the bottom of the garbage bag and if there are handles then cut those off as well.
DO NOT cut the sides yet.
Lay the garbage bag on a flat iron safe surface. I just placed a big towel underneath. Align the parchment paper underneath the garbage bag and one over the garbage bag. Then take your hot iron and iron the top side of the parchment paper, near one of the folded edges leaving enough space where you can draw elastic through. Iron from end to end... which is technically from the top of the bag to the bottom.
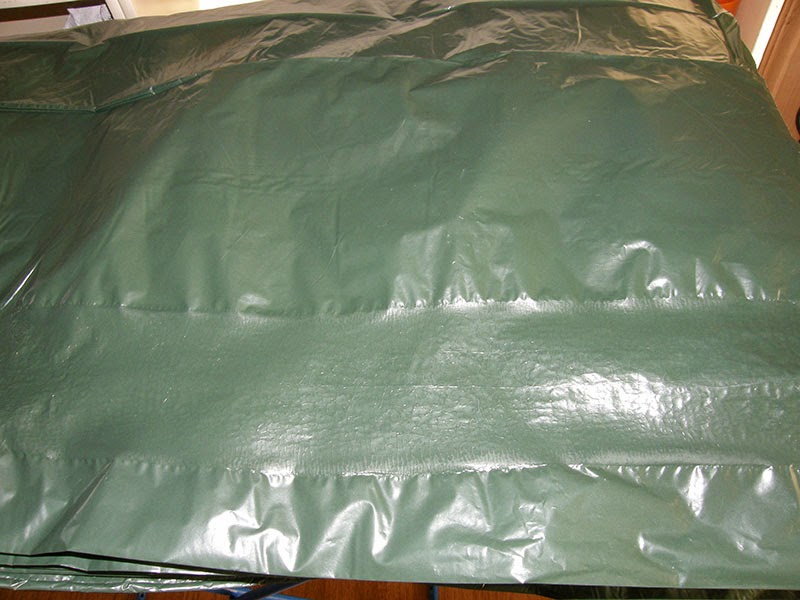
Do you see where the iron melted together the plastic and where there is place to draw elastic through? It is kind of like sewing but with an iron... magic! If it didn't work, you can run the iron over the top of it again, but be careful that it doesn't melt a hole in it.
It should look something like the above picture.
(You can click the image to enlarge.)
(You can click the image to enlarge.)

STEP TWO
Fold the garbage bag in half and start cutting strips. Make sure that you DO NOT cut all the way through the part that you just melted together or it will fall apart. Leave a couple inches of the ironed part uncut. I also tried folding it in fourths but I wasn't able to cut as straight so I stuck with keeping the bag folded in half while I cut. I had this clipped to a cardboard so it would stay in place while I cut or you can place weights on it. Remember to cut the ends/folds at the bottom. Best method is to gather the strips up like a pony tail and clip the ends off in one snip.

STEP THREE
Take your elastic (I used chinese jump rope because it was cheaper) as shown here and pull it through where the opening is. Use a big plastic needle that you can tie the elastic at the end (or something like it) to make it easier to pull it through. Then tie the ends together.

this is how your hula skirt should look.
You can decorate the waist with flowers if you wish.
If you need a shorter skirt then bunch the ends up again and cut more off.
10 minutes to make one. I made 20!
If you need a shorter skirt then bunch the ends up again and cut more off.
10 minutes to make one. I made 20!
Very simple!

Please feel free to ask me any questions if something is unclear.

Please feel free to ask me any questions if something is unclear.
HOW TO MAKE THE PALM TREE

Here is the palm tree up close and personal. Looks real doesn't it? ;-)

I took a bunch of card board boxes and rolled then unrolled them up individually so it would be easier later. Then, on the floor I overlapped each cardboard about halfway into the next, until I reached the height I wanted, about 10 feet. I used clear packing tape to tape them together on the inside (length ways) and then I rolled it up into a long pipe and taped around each layer from top to bottom. Then to make it more real looking, I wrapped brown packing tape around where the edges met.
For the leaves, I used the same concept as I made the hula skirts; with the iron. You can choose how many leaves you wish to make. I chose six. Using a box cutter, I cut out 6 long *L* shapes out of the cardboard. I put the plastic around it and ironed the plastic together fitting around the card board. Remember to use parchment paper and then cut strips for the leaves. In the short part of the *L*, cut a little slit not more than halfway and cut 6 slits (same size as you did in your *L's*) around at the top on the cardboard pipe. Match the slits together from the *L* to the cardboard pipe and insert each one in it's place. I also made a tree stand out of cardboard.
It took about an hour to make.
It took about an hour to make.
I hope these directions were understandable. Please let me know if something is unclear.
I orginally wanted to make this tree:
https://www.youtube.com/watch?v=VIAWgl3PxsY
But was not able to find tall enough cardboard so I had to think of a plan B.
I actually like my plan B better. ☺
I wonder what other creations I can make using the *iron sewing* method?
 UPDATE AUGUST 2015:
I recently thought of a new idea on how to make the leaves. Use a floral foam ball and then use wire clothes hangers or wooden sticks and iron the leaves around the sticks/wires. Leave enough wire space so you can stick it in the foam. Seems like you'd need to make more leaves with this method to cover the ball and get the full effect? Wish I had thought of this for the party. If anyone tries this, please do let me know how it worked out for you. I haven't had a chance to try this out yet and don't really have any need to do it now when our party was a few months ago.
I orginally wanted to make this tree:
https://www.youtube.com/watch?v=VIAWgl3PxsY
But was not able to find tall enough cardboard so I had to think of a plan B.
I actually like my plan B better. ☺
I wonder what other creations I can make using the *iron sewing* method?

I recently thought of a new idea on how to make the leaves. Use a floral foam ball and then use wire clothes hangers or wooden sticks and iron the leaves around the sticks/wires. Leave enough wire space so you can stick it in the foam. Seems like you'd need to make more leaves with this method to cover the ball and get the full effect? Wish I had thought of this for the party. If anyone tries this, please do let me know how it worked out for you. I haven't had a chance to try this out yet and don't really have any need to do it now when our party was a few months ago.
No comments:
Post a Comment
Thank you for taking the time to read our blog. :-)